Multi-master cluster🔗︎
This example demonstrates how to use Kubitect to set up a Kubernetes cluster with 3 master and 3 worker nodes.
By configuring multiple master nodes, the control plane remains to operate normally even if some master nodes fail. Since Kubitect deploys clusters with a stacked control plane, the redundancy is ensured as long as there are at least (n/2)+1 master nodes available.
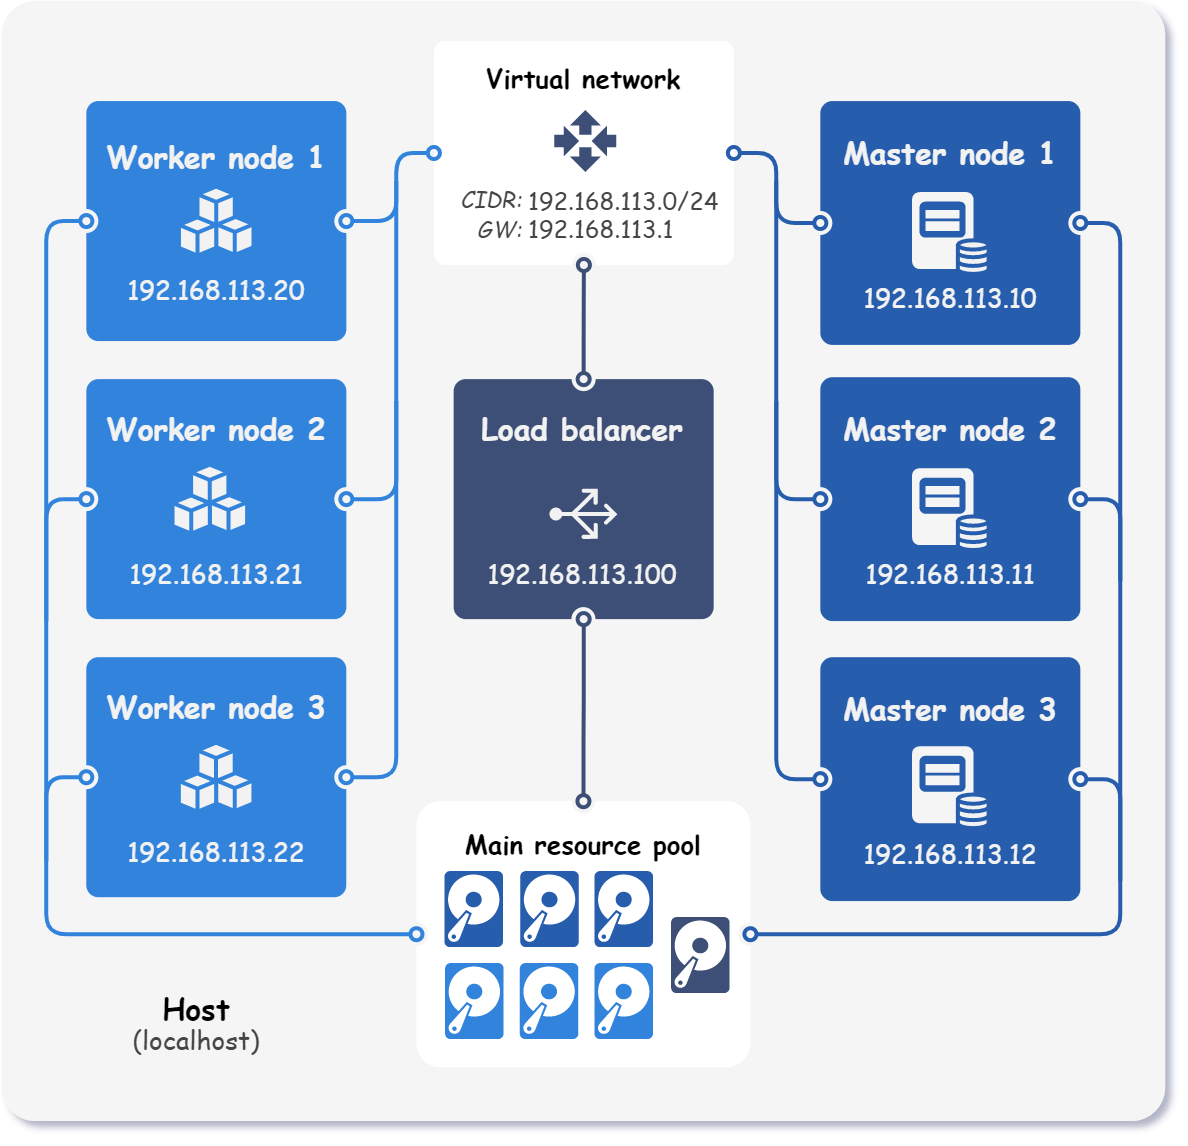
The final topology of the deployed Kubernetes cluster is depicted in the figure below.
Note
This example skips the explanation of some common configurations such as hosts, network, and node template, as they are already covered in detail in the Getting started (step-by-step) guide.
Preset available
To export the preset configuration, run: kubitect export preset example-multi-master
Step 1: Cluster configuration🔗︎
When deploying a multiple master Kubernetes cluster using Kubitect, it is necessary to configure at least one load balancer. The load balancer is responsible for distributing traffic evenly across the control plane nodes. In the event of a particular master node failure, the load balancer automatically detects the unhealthy node and routes traffic only to the remaining healthy nodes, ensuring the continuous availability of the Kubernetes cluster.
The figure below provides a visual representation of this approach.
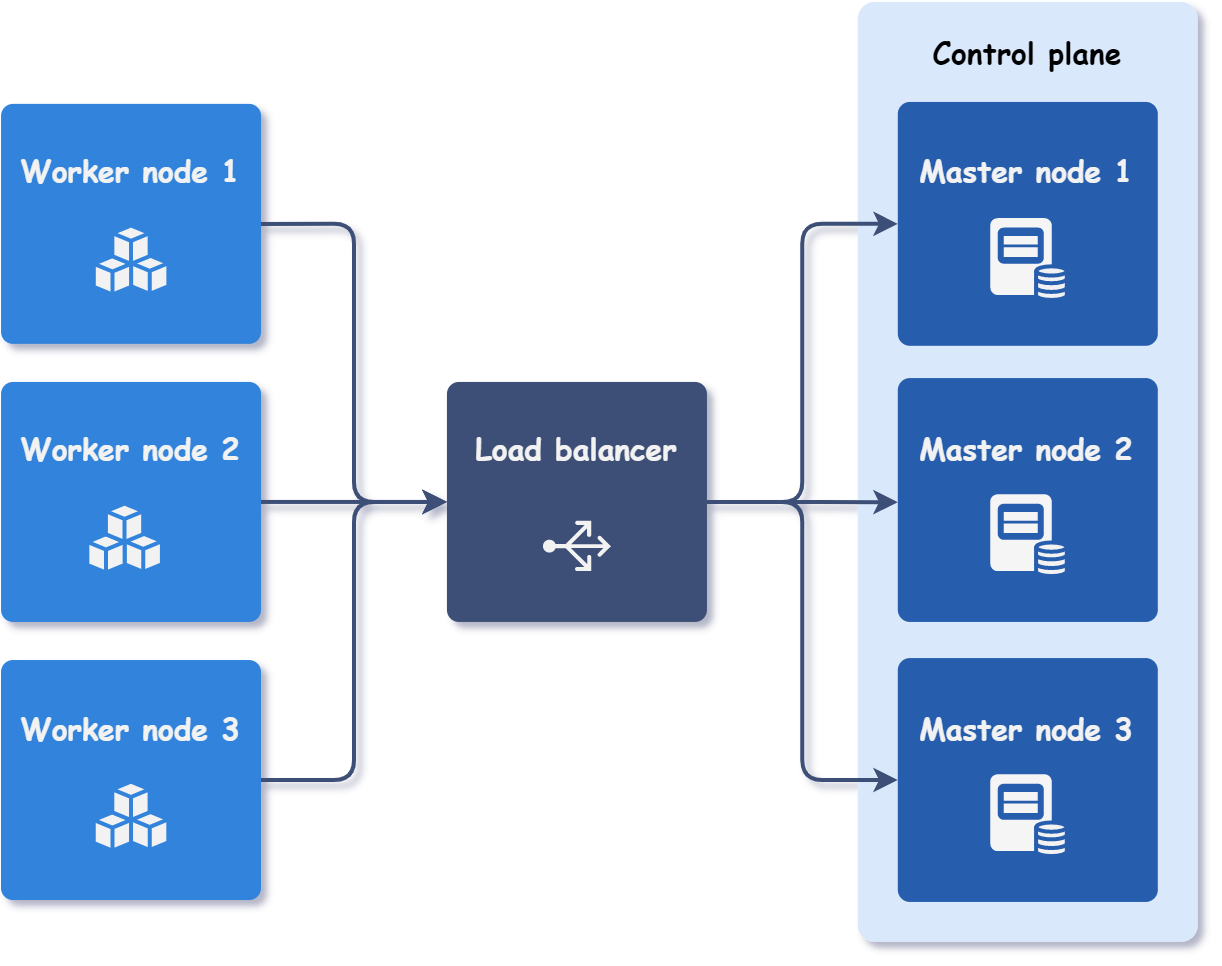
To create such a cluster, all we need to do is specify the desired node instances and configure one load balancer. The control plane will be accessible through the load balancer's IP address.
cluster:
  ...
  nodes:
    loadBalancer:
      instances:
        - id: 1
          ip: 192.168.113.100
    master:
      instances: # (1)!
        - id: 1
          ip: 192.168.113.10
        - id: 2
          ip: 192.168.113.11
        - id: 3
          ip: 192.168.113.12
    worker:
      instances:
        - id: 1
          ip: 192.168.113.20
        - id: 2
          ip: 192.168.113.21
        - id: 3
          ip: 192.168.113.22
- Size of the control plane (number of master nodes) must be odd.
Kubitect automatically detects the load balancer instance in the configuration file and installs the HAProxy load balancer on an additional virtual machine. The load balancer is then configured to distribute traffic received on port 6443, which is the Kubernetes API server port, to all control plane nodes.
Final cluster configuration
hosts:
  - name: localhost
    connection:
      type: local

cluster:
  name: k8s-cluster
  network:
    mode: nat
    cidr: 192.168.113.0/24
  nodeTemplate:
    user: k8s
    updateOnBoot: true
    ssh:
      addToKnownHosts: true
    os:
      distro: ubuntu22
  nodes:
    loadBalancer:
      instances:
        - id: 1
          ip: 192.168.113.100
    master:
      instances:
        - id: 1
          ip: 192.168.113.10
        - id: 2
          ip: 192.168.113.11
        - id: 3
          ip: 192.168.113.12
    worker:
      instances:
        - id: 1
          ip: 192.168.113.20
        - id: 2
          ip: 192.168.113.21
        - id: 3
          ip: 192.168.113.22

kubernetes:
  version: v1.28.6
  networkPlugin: calico
Step 2: Applying the configuration🔗︎
To deploy a cluster, apply the configuration file:
kubitect apply --config multi-master.yaml