Quick start🔗︎
In this quick guide, we will show you how to use the Kubitect command line tool to quickly deploy a simple Kubernetes cluster.
To get started, you will need to apply a cluster configuration file to the Kubitect command line tool. You can either prepare this file manually, as explained in our Getting started guide, or use one of the available presets.
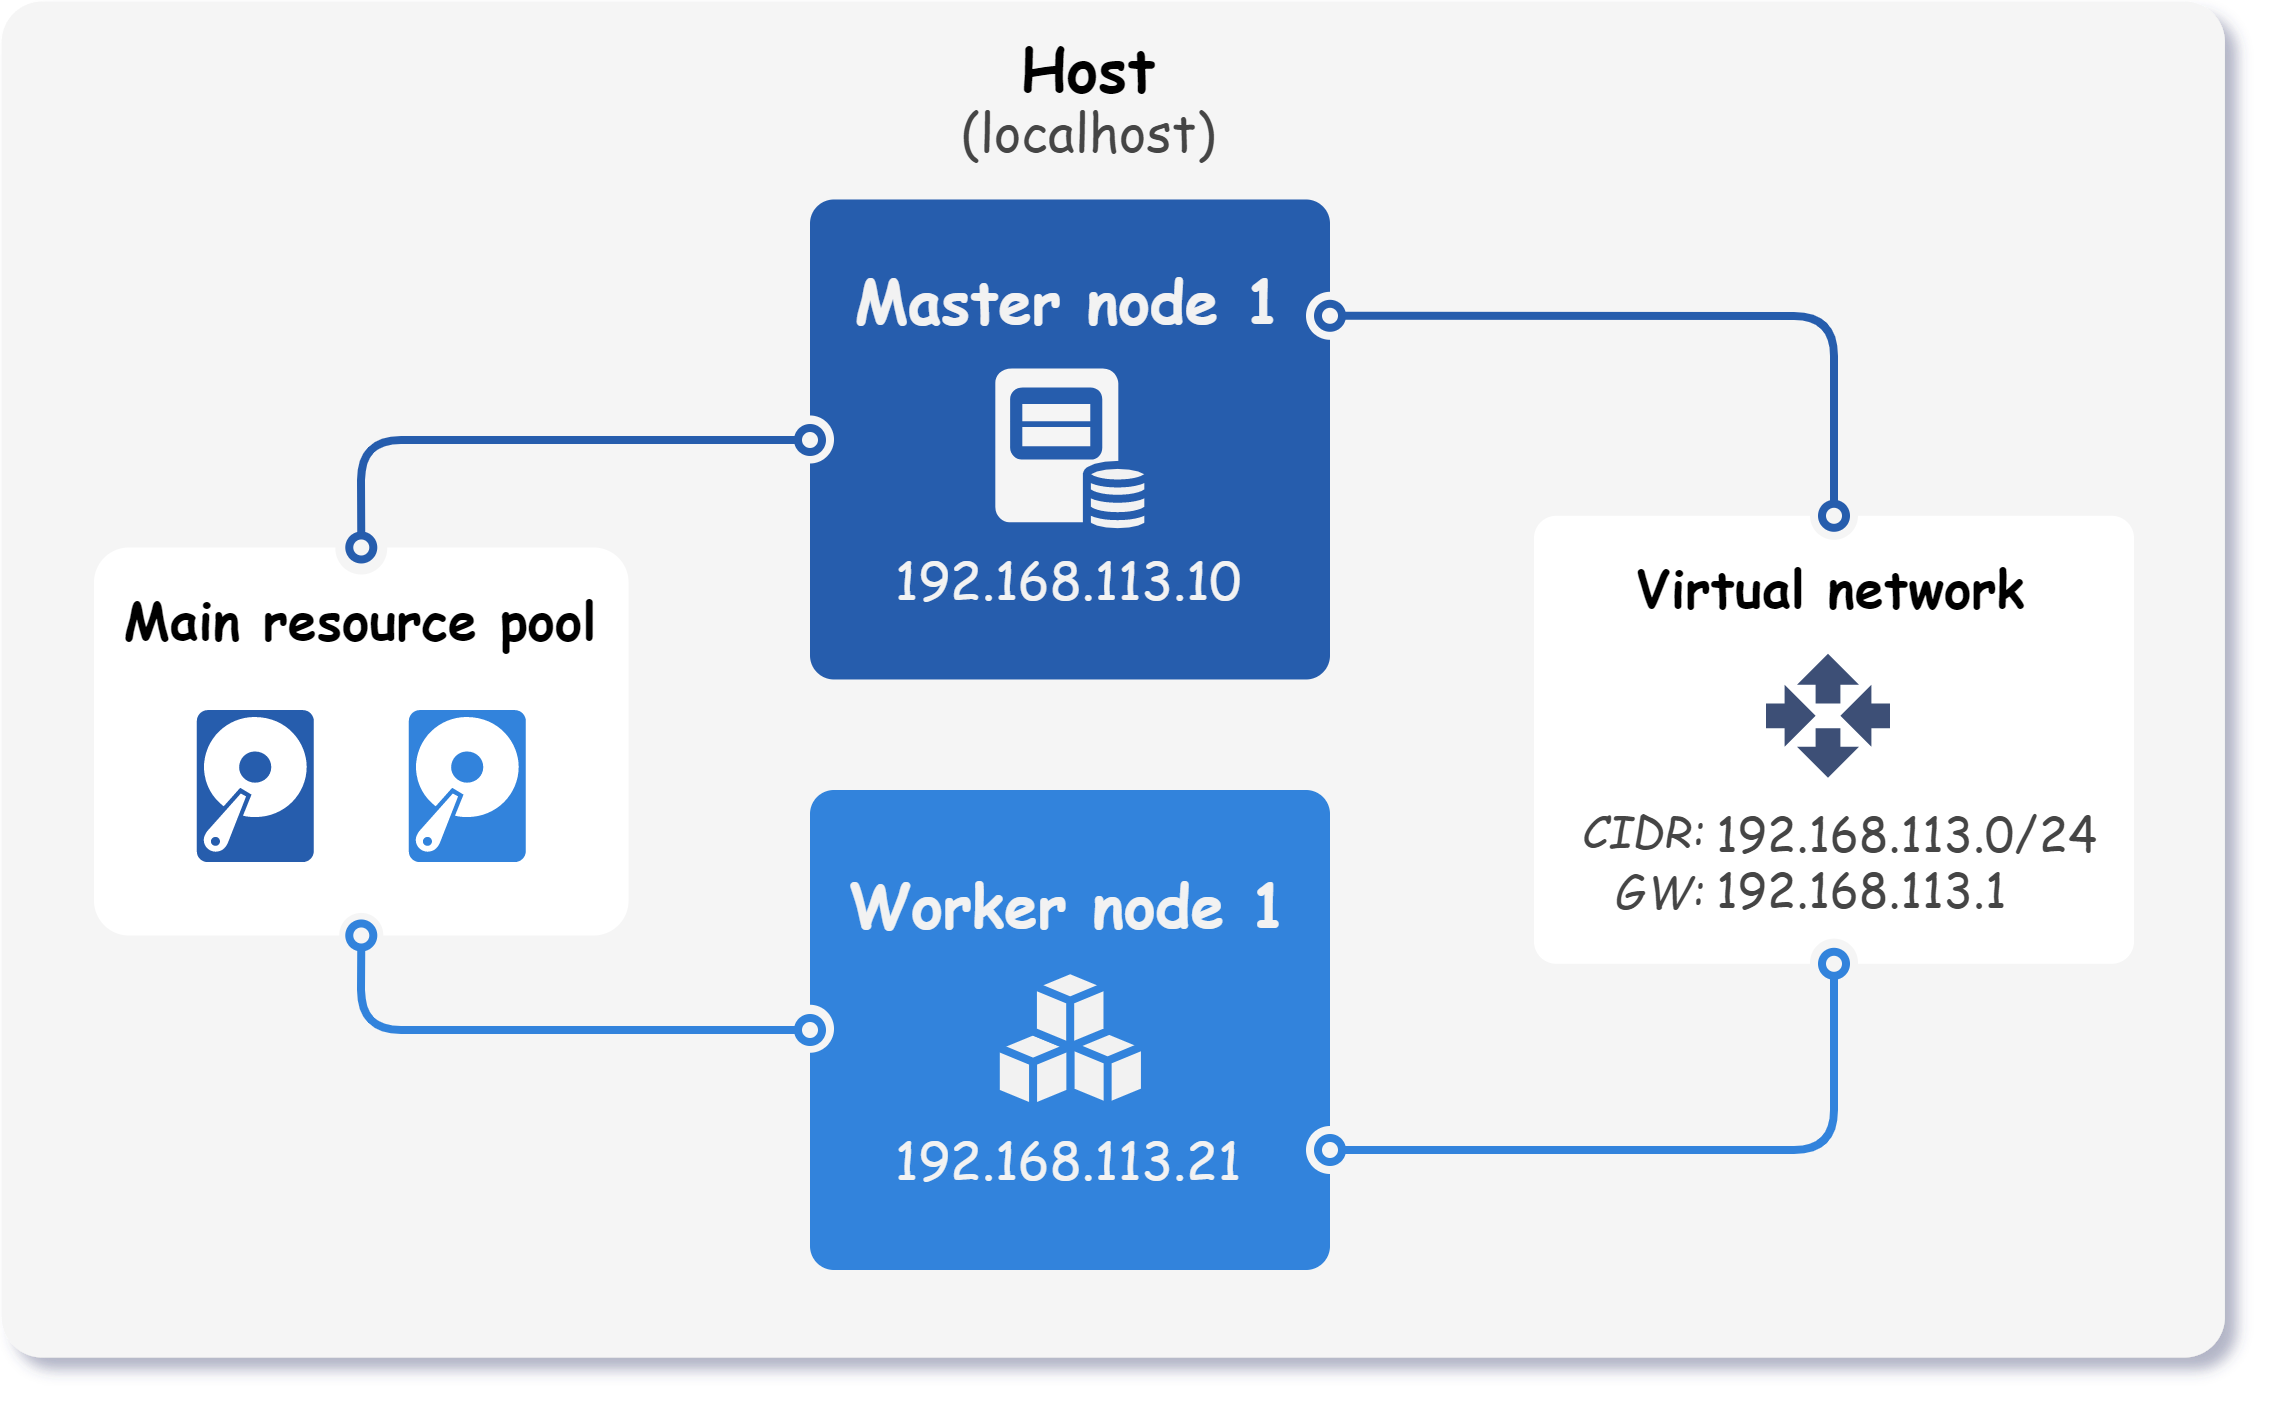
For the purposes of this quick start guide, we will be using a getting-started preset, which defines a cluster with one master and one worker node. The resulting infrastructure is shown in the image below.
Step 1 - Create a Kubernetes cluster🔗︎
Export the gettings-started preset:
kubitect export preset --name getting-started > cluster.yaml
Then, apply the exported configuration file to the Kubitect:
kubitect apply --config cluster.yaml
That's it! The cluster, named k8s-cluster, should be up and running in approximately 10 minutes.
Step 2 - Test the cluster🔗︎
To test that the cluster is up and running, display all cluster nodes using the exported Kubeconfig and the kubectl command:
kubectl --context k8s-cluster get nodes
 Congratulations, you have successfully deployed a Kubernetes cluster using Kubitect!