Multi-worker cluster🔗︎
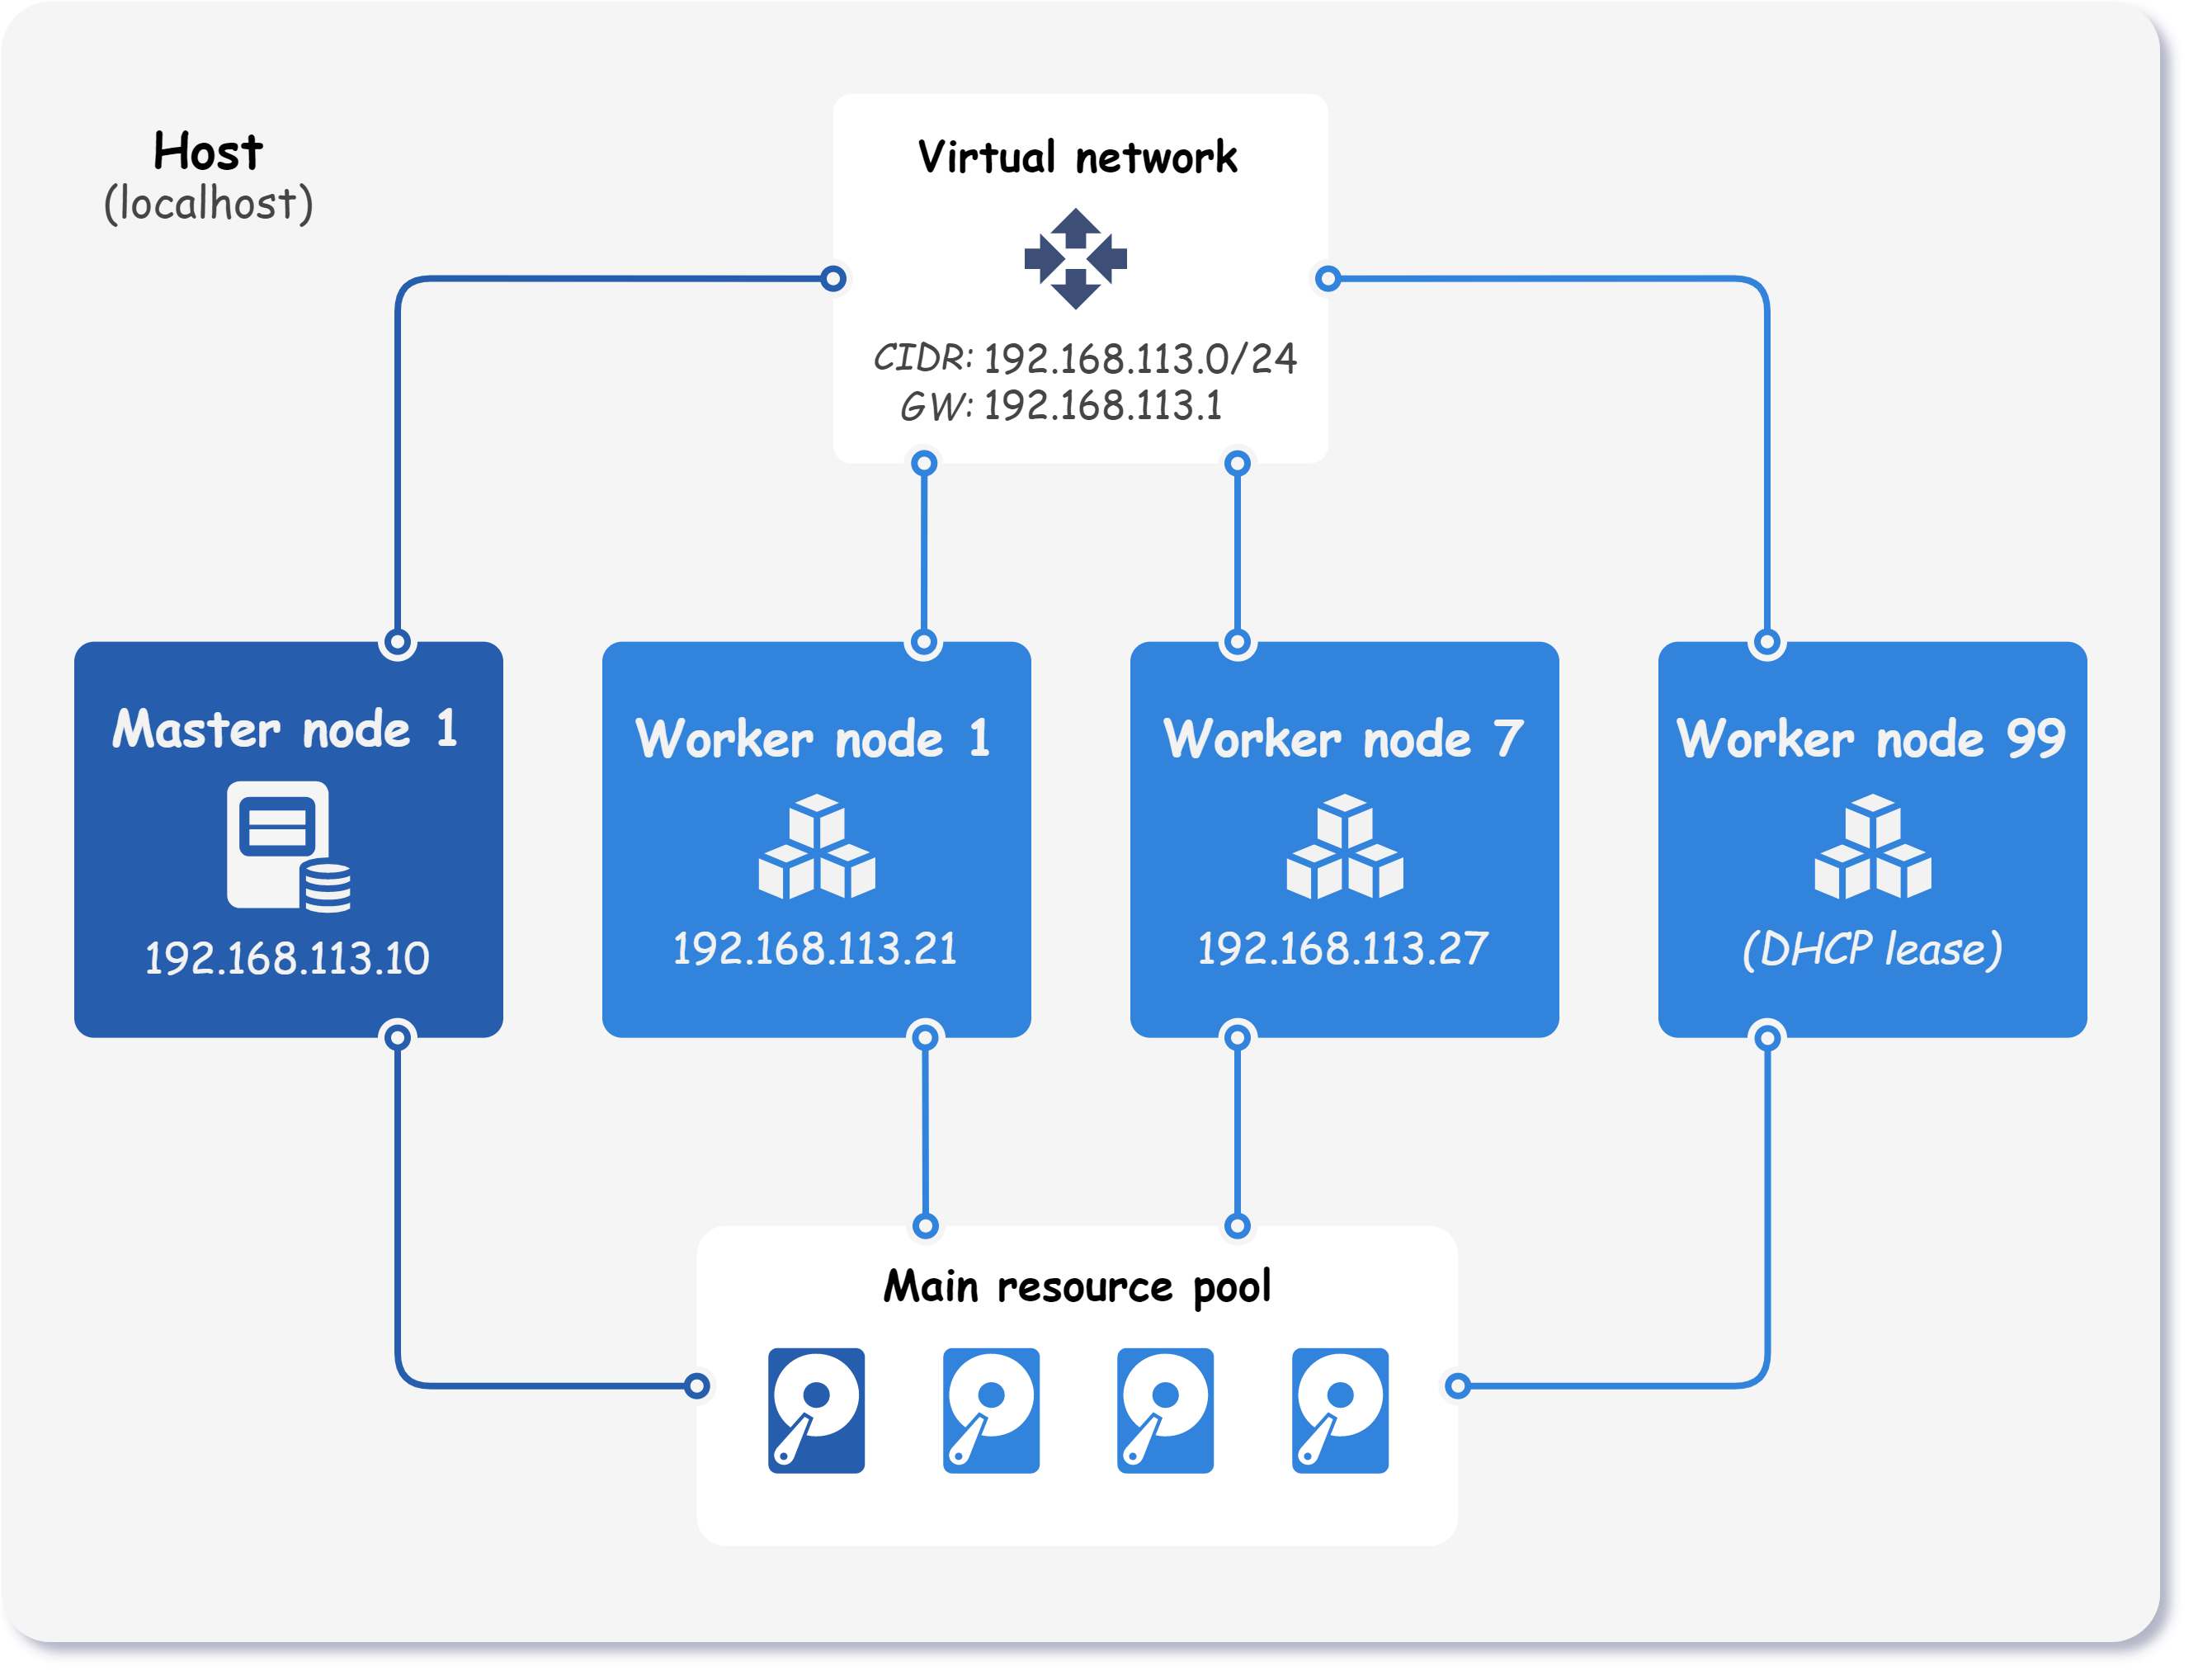
This example demonstrates how to use Kubitect to set up a Kubernetes cluster consisting of one master and three worker nodes. The final topology of the deployed Kubernetes cluster is shown in the figure below.
Note
This example skips the explanation of some common configurations such as hosts, network, and node template, as they are already covered in detail in the Getting started (step-by-step) guide.
Preset available
To export the preset configuration, run: kubitect export preset example-multi-worker
Step 1: Cluster configuration🔗︎
You can easily create a cluster with multiple worker nodes by specifying them in the configuration file. For this example, we have included three worker nodes, but you can add as many as you like to suit your needs.
cluster:
  ...
  nodes:
    master:
      instances:
        - id: 1
          ip: 192.168.113.10 # (1)!
    worker:
      instances:
        - id: 1
          ip: 192.168.113.21
        - id: 7
          ip: 192.168.113.27
        - id: 99
- Static IP address of the node. If the
ipproperty is omitted, the DHCP lease is requested when the cluster is created.
Final cluster configuration
hosts:
  - name: localhost
    connection:
      type: local

cluster:
  name: k8s-cluster
  network:
    mode: nat
    cidr: 192.168.113.0/24
  nodeTemplate:
    user: k8s
    updateOnBoot: true
    ssh:
      addToKnownHosts: true
    os:
      distro: ubuntu22
  nodes:
    master:
      instances:
        - id: 1
          ip: 192.168.113.10
    worker:
      instances:
        - id: 1
          ip: 192.168.113.21
        - id: 7
          ip: 192.168.113.27
        - id: 99

kubernetes:
  version: v1.28.6
  networkPlugin: calico
Step 2: Applying the configuration🔗︎
To deploy a cluster, apply the configuration file:
kubitect apply --config multi-worker.yaml